How to Organize Your Planner in 11 Simple Steps

Planners are an indispensable tool for staying organized and managing your time effectively. Whether you're a student, a professional, or simply someone trying to make the most of your days, a well-organized planner can be a game-changer. That’s why our planning experts have created the following 11 simple steps to help you organize your planner so you can stay organized at work, at school, and in life.
How to Organize a Planner Step by Step
Organizing your planner may seem like a daunting task, but breaking it down into manageable steps can make it much more approachable (and sustainable!).
Step 1: Get the Right Planner for You.
Choosing the right planner is the first and most crucial step in your journey to becoming more organized and efficient. Your planner is like your trusty sidekick, always there to help you navigate your busy life. To make sure you're starting on the right foot, let's explore different planner types and how to pick the perfect planner for you:
Size Matters
Whether you prefer a compact paper planner that easily fits into your purse, a medium-sized planner for on-the-go convenience, or a larger desk planner for a more comprehensive view of your schedule, you'll find an option that suits you. The LifePlanner™ is a best-selling option with versatile use for your busy schedule.
Learn more about Different Planner Sizes + How to Choose.
Layout and Customization
Paper planners come in various layouts, including vertical, horizontal, and hourly layouts. This allows you to choose a format that aligns with your planning style. That’s why customers love the high level of customization Erin Condren planners offer. You can select the layout, and color scheme, and even personalize your planner cover with your name or a motivational quote.
To learn more about layouts, check out these planner layout ideas shared by our experts.
Binding Options
The binding of your planner is an important consideration. Choose between a range of options when shopping around for planners. You can find coil-bound planners, which are durable, customizable, and allow for snap-in organizational accessories like interchangeable covers, wet-erase dashboards, sticky notes and pockets, and more. You can also find softbound weekly planners with a lay-flat design that offer a sleek and professional look.
Learn more about Spiral Planners, Softbound Planners, and Ring Agenda Planners.
Aesthetics
Personalizing your planner's aesthetics is one of the most enjoyable aspects of the process. Whether you love minimalistic, elegant styles, or you're more into vibrant and colorful designs, find a best-selling planner that resonates with your preferences. The ability to choose your planner's cover design, color theme, and even add your own photos or artwork gives you the freedom to make your planner truly your own.
Accessories and Extras
There is a wide range of accessories and extras that can enhance your planner experience. You can opt for colorful stickers, sticky notes, and interchangeable covers to add a touch of creativity and fun to your planning routine. Additionally, you can include accessories like elastic bands, page markers, and pen holders to keep your planner well-organized.
Paper Quality
High-quality paper is an important factor in the planner experience. This ensures that your pens won't bleed through the pages, and your writing experience will be smooth and enjoyable.
When selecting your planner, it's important to think about how you'll be using it. Are you a student who needs to manage projects and exams, assignments and deadlines? If so, you’ll want to know how to use a planner for school? Or are you a professional juggling work meetings and personal appointments? Or perhaps you're someone who enjoys journaling and goal setting. By understanding your specific needs and preferences, you can choose the best planner for you. Your journey to a more organized and fulfilling life begins with the right planner in hand.
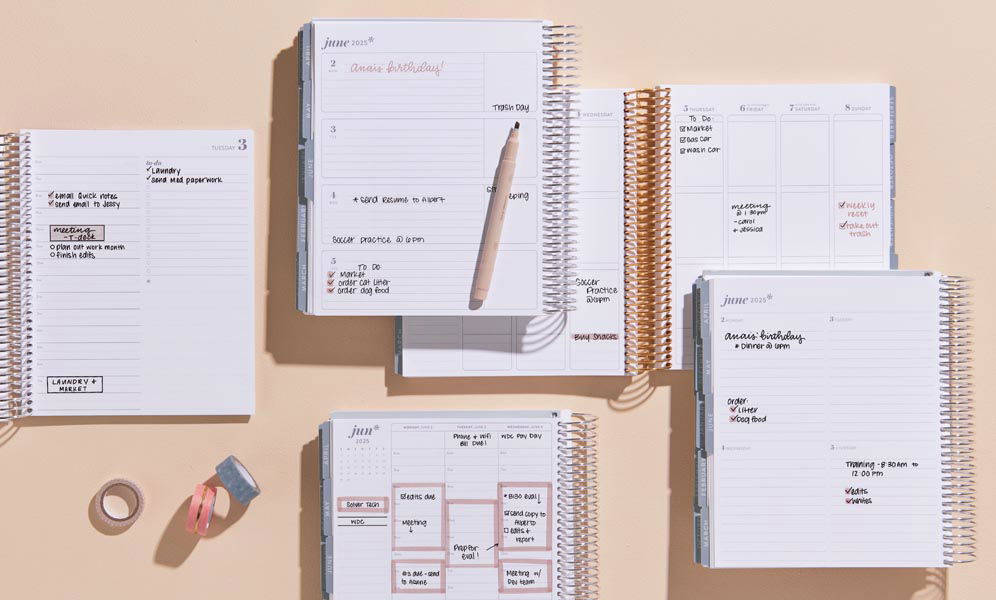
Step 2: Add Events, Deadlines, and Appointments.
Begin by transferring important dates, appointments, and deadlines into your planner. Whether it's work meetings, doctor's appointments, birthdays, or school assignments, having them in one place will help you stay on top of your commitments.
Use different color codes or symbols to distinguish between various types of events. For instance, you can use a red pen for work-related appointments and a green pen for personal events. This visual distinction will make it easier to identify different aspects of your life at a glance.
Step 3: Establish Weekly, Monthly, and Yearly Goals.
To keep yourself motivated and focused, it's essential to set goals. Start with yearly goals that you want to achieve over the course of the year. These can be related to your career, personal development, health, or any other area of your life.
Break down your yearly goals into monthly objectives. What specific steps do you need to take each month to work towards your bigger goals?
On a weekly basis, outline what needs to be accomplished to support your monthly objectives. Having a hierarchy of goals makes your long-term aspirations more achievable and less overwhelming.
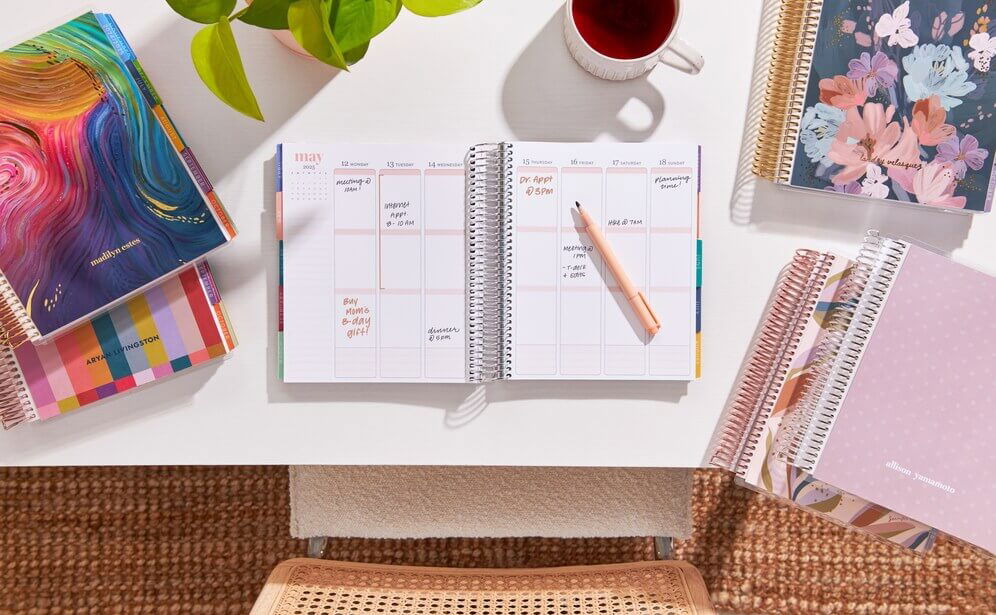
Step 4: Create Daily and Weekly Tasks Lists.
With your goals in mind, create daily and weekly task lists. Each day, write down the tasks that need to be completed to move you closer to your weekly goals. These tasks should be specific, actionable, and achievable in one day.
Consider using a combination of to-do lists and checkboxes to mark tasks as completed. This can provide a satisfying visual representation of your progress.
Step 5: Break Down Bigger Goals and Tasks Into Actionable Steps.
Bigger goals and ideas can often feel daunting. To make them more manageable, break them down into smaller, actionable steps. This not only makes the task less intimidating but also allows you to track your progress more effectively.
For example, if your goal is to write a research paper, break it down into steps like research, outline, write an introduction, gather sources, write the body, write a conclusion, and proofread. This way, you can focus on completing one step at a time and move steadily toward your ultimate goal.
Step 6: Create a Monthly Overview.
Once you have your weekly and daily tasks set, it's time to create a monthly calendar overview. For example, a monthly overview helps you see the big picture of what needs to be accomplished in the coming weeks. Use your planner's monthly calendar view to jot down important events, deadlines, and goals for the month.
Consider using different colors to categorize your entries. For instance, you can use one color for work-related events, another for personal events, and another for important deadlines. This visual separation makes it easy to identify and prioritize your commitments.
Step 7: Assign Time and Deadlines to Goals and Tasks.
Effective time management productivity is crucial to maintaining an organized planner. Assign specific time slots to tasks and appointments in your weekly and daily schedules. Be realistic about the time each task will take, and don't forget to allocate time for breaks and relaxation.
Setting deadlines for tasks and goals creates a sense of urgency and helps you stay accountable. It's essential to strike a balance between being flexible with your schedule and adhering to deadlines, as unforeseen circumstances can arise. Staying focused and productive is a common challenge, but the good news is you can also use your planner to create an easy-to-follow productivity plan.
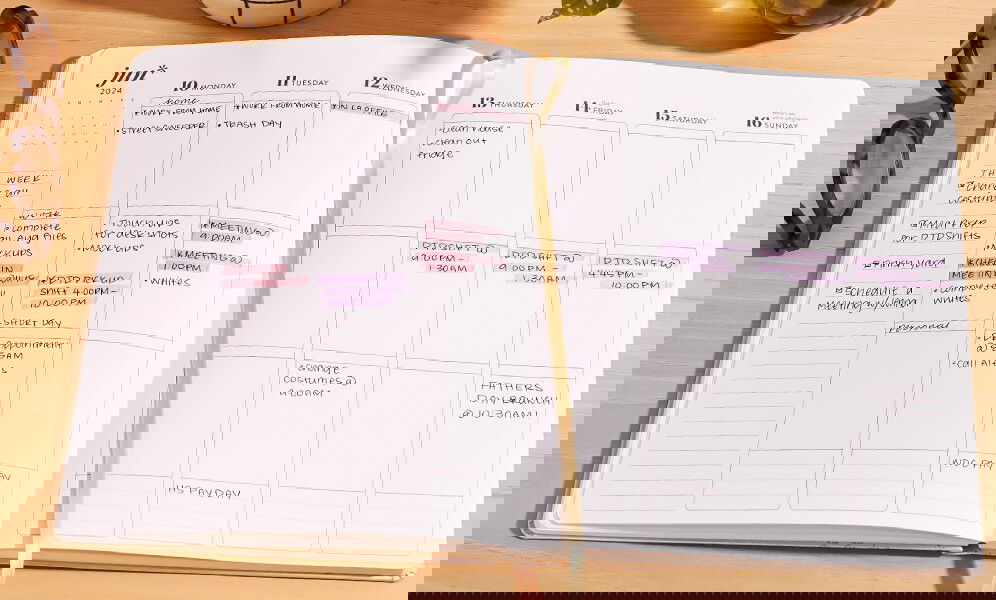
Step 8: Plan Out Your Daily and Weekly Schedule.
Now that you have your daily tasks and appointments organized, it's time to plan your daily and weekly schedules. Consider the following tips to make the most of your planner:
- Time blocking: Allocate specific time blocks for different types of tasks or activities. For example, you can have a dedicated time block for work, exercise, and leisure.
- Prioritize tasks: Identify the most important tasks for the day and tackle them during your peak productivity hours.
- Be realistic: Avoid overloading your schedule with tasks, leaving no room for unforeseen events or relaxation.
- Review and adjust: Regularly review and adjust your schedule as needed. Flexibility is key to effective planning.
Step 9: Personalize Your System with Stickers, Accessories and Color Coding.
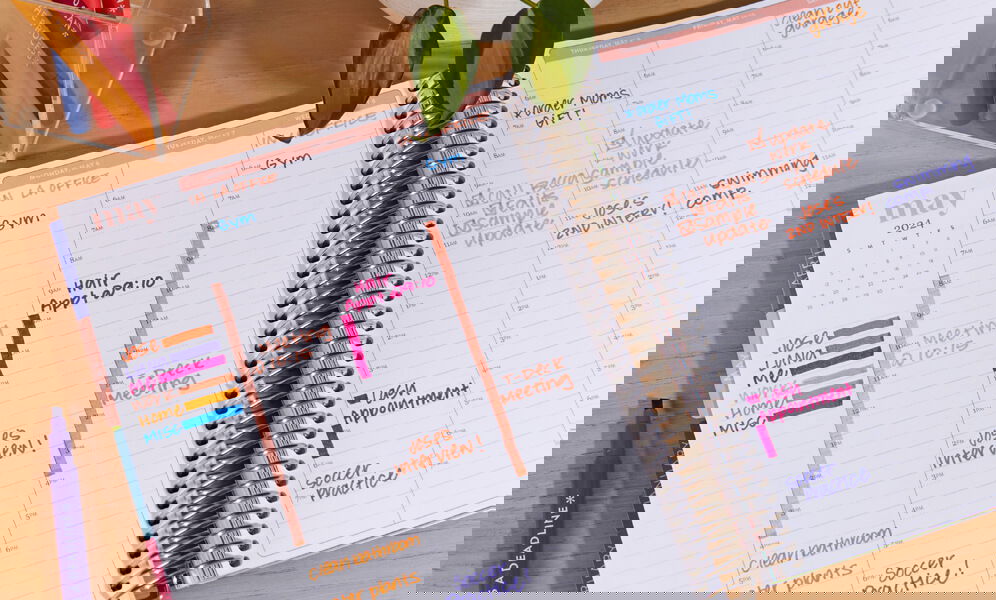
Personalizing your weekly planner can make it more enjoyable to use and help you stay organized. Here are some ways to add your personal touch:
- Stickers: Decorative and functional stickers can be used to highlight important events, deadlines, and goals.
- Accessories: Consider using sticky notes, page markers, and dividers to customize your planner and make it more user-friendly.
- Color-coding: Use different colors for various categories of tasks, appointments, or goals. This visual organization can be a helpful visual aid.
Remember that personalization should enhance your planner's functionality and not complicate it. Keep it simple and visually appealing.
Step 10: Be Consistent.
Consistency is the key to maintaining an organized schedule. Make it a daily habit to update your planner, review your goals, and assess your progress. Stick to your planning routine, and your weekly planner will become an indispensable part of your life.
Step 11: Review and Reassess Regularly.
As you work through your planner, it's essential to review and reassess your goals and tasks regularly. Are you making progress? Are your goals still relevant? Do you know how to create goals the SMART way? Do you need to adjust your priorities? Periodically reviewing and reassessing your planner will help you stay on track and adapt to changes in your life.
Organizing your planner is a valuable skill that can vastly improve your productivity, reduce stress, and help you achieve your goals. By following these 11 simple steps, you can find a daily planner, weekly planner, or monthly planner that perfectly fits your needs and empowers you to make the most of your time. So, pick up that planner, check out these super-helpful planner tips for beginners, get organized, and take control of your life – one well-planned day at a time. Your future self will thank you for it!
Related Planning Guides
You may also enjoy these other popular, guided planning tips, prompts, and inspiration from our experts:
- How to Use a Weekly Planner
- How to Use Multiple Planners
- 5-Minute Planner Check-Ins: 60 Planner Prompts to Inspire You
- Why You Need a Mid-Year Planner + 16 Creative Planner Setup Ideas
- Daily LifePlanner™ vs. Weekly LifePlanner™: Which One Is Better for You?
- Family Reunion Planning Guide: 10 Steps to the Perfect Event
- How to Plan in a Horizontal Weekly LifePlanner™ + 10 Creative Planner Prompts
- Family Reunion Planning Guide: 10 Steps to the Perfect Event
- How to Start Planning: 15 Tips to Start a Planner
- Best Planners (for every goal, style, and schedule)
- How to Use an Undated Planner + Prompts