How to Plan in a Vertical Weekly LifePlanner™ + 10 Creative Planner Prompts

In the planner-verse, finding the perfect weekly planner among many delightful planner layouts can be as daunting as finding the perfect pair of jeans. But fear not! Our Erin Condren planning experts are here to guide you. We’ll start with the most popular LifePlanner™ layout: vertical.
Let’s dig into what makes this our best-selling weekly planner and how to plan in the vertical LifePlanner™. At the end of this guide, we’ll also set you up with our favorite vertical planner prompts + other LifePlanner™ layout guides to help you discover the best planner that will give you that planner peace you seek.
What Is a Vertical LifePlanner™?
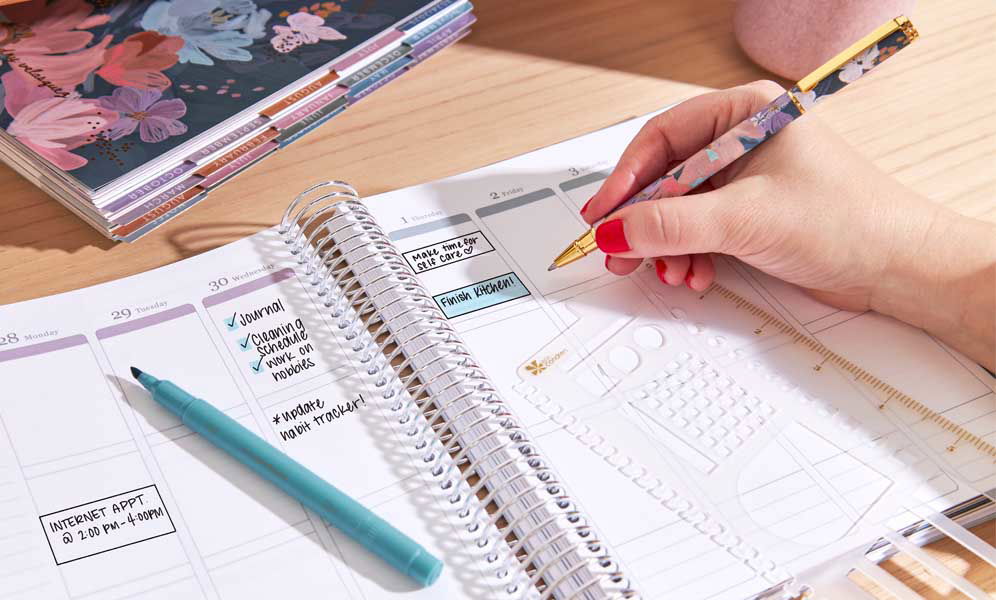
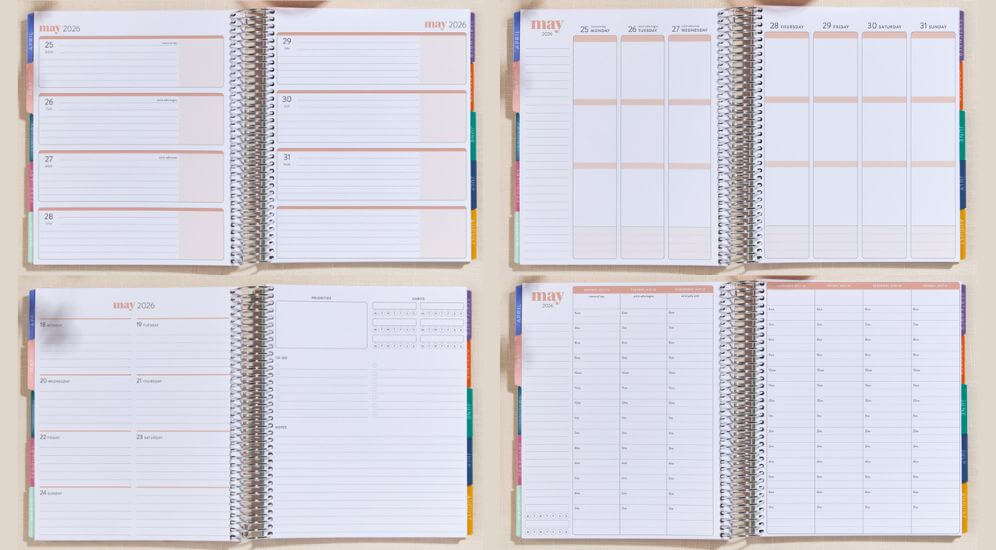
The Erin Condren Vertical LifePlanner™ is a classic. This is the original LifePlanner™ that started it all. This best-selling weekly planner offers four vertical boxes for each day of the week (three blank, one lined), ready for you to fill with your plans, tasks, and dreams. It comes in two planner sizes: 7” x 9” and 8” x 10”. It's a tried and true customer favorite, beloved by many for its flexibility and customizable organization.
Vertical LifePlanner™ Pros and Cons
So, what sets the top-selling weekly vertical LifePlanner™ apart? Let's break it down:

Pros:
- Flexibility in how you use those four daily boxes.
- Perfect for categorizing your day and prioritizing tasks.
- A canvas for creativity, with endless possibilities.
- Ideal for those who love to track habits or separate responsibilities.
Cons:
- Limited writing space, which might not suit those with big handwriting.
- No lines in three out of four of the boxes can make it tricky to write full sentences.
- Beginners might find it challenging to optimize those three blank boxes.
- Not available in the compact A5 planner size. (Smallest size available is 7” x 9”.)
Who Should Use the Vertical LifePlanner™?
The Vertical LifePlanner™ is perfect for the free spirits who crave endless planning possibilities. Whether you're a time-based planner, a category connoisseur, or just enjoy a blank canvas, this layout has your back.
How to Plan in a Vertical LifePlanner™

For those who are team Vertical LifePlanner™ – or are curious how to plan in this popular layout – below are our top planning tips and tricks from our experts.
Step 1: Define Your Weekly Planning Approach.
- The Vertical LifePlanner™ has the most versatile planner layout so you can customize how you organize your weeks.
- With open vertical boxes for weekly planning, decide how you want to plan each week.
- Popular ways to organize weekly to-dos, meetings, appointments, and more include by time of day, by priorities, by subject, by person (for those managing family or team schedules), the planning possibilities are virtually endless.
- Use your monthly calendars (for recurring appointments, deadlines, and high-level planning) to guide and free up more space for more detailed planning in your weekly spreads.
Pro Tip: Don’t be afraid to experiment with different ways of planning each week until you find your planning style.
Step 2: Get the Most Out of Your Vertical Layout.
- Create your own abbreviation system for commonly used tasks or events. This helps save space and allows for quick jotting down of information within the narrow vertical boxes.
- Make use of small sticky notes as overlays on your vertical sections. This enables easy adjustments and additions to your schedule without rewriting or cluttering.
- Use the blank vertical boxes for mini bullet journaling (you can even add your bullet journaling key in the margin for quick reference) to fit more planning with less clutter.
Pro Tip: Don’t forget the white spaces in your planner. Jot down inspirational quotes, affirmations, doodle, decorate with stickers, anything you like. Unless white space makes you happy. In that case, strategically leave them blank and enjoy the extra breathing room!
Step 3: Embrace Flexibility and Creativity.
- Adjust and evolve your planning approach as needed throughout the year.
- Adapt to seasonal shifts. Utilize the vertical boxes to organize summer activities and shifts in schedules (same goes for fall and holiday shifts).
- Explore different planning techniques to accommodate new responsibilities or to find your unique planning method.
Step 4: Explore Additional Planner Features.

- Don't hesitate to experiment with the various features of your planner to enhance functionality and organization.
- Use the customizable 12-box spread to create a vision board, set yearly goals, map out vacations for the year, get as creative as you like.
- Utilize the monthly productivity pages to track habits, set monthly goals, and more.
- Use the note pages throughout your planner to journal, extend your planning, make grocery lists and meal plans, take notes, and more.
Step 5: Use the Strategic Lined Sections.

So, there are some horizontal lines in the Vertical LifePlanner™ (in addition to the note pages)!
- Take advantage of the narrow lined section on the side of each monthly calendar to record monthly wins, note monthly priorities, write recurring tasks, and more.
- You can also use the lined section in the left margin of the weekly spreads to track weekly productivity and habits, highlight important notes, and more.
- Use the small lined boxes at the bottom of each daily column in the weekly spreads for setting intentions, jotting reminders, micro-journaling, or noting surprise to-dos!
Pro Tip: Utilize the yearly overview spread for scheduling future appointments/events. Highlight and note them there for easy transfer to your new planner when needed.
10 Creative Vertical LifePlanner™ Planner Prompts

In addition to the prompts embedded in the five planner setup steps above, here are more Vertical LifePlanner™ prompts to fuel your planning journey:
- Ascending Action: Plan your week's journey upwards, utilizing the vertical layout to map out your progression towards success.
- Visual Map: Incorporate a visual map or mind map into your Vertical LifePlanner™ for brainstorming, project planning, or goal visualization.
- Top 3 Planning: Label each day's boxes with the top three priorities to keep your planning focused.
- Time-Based Organization: Use Morning, Afternoon, and Evening labels if unsure how to categorize tasks, ensuring efficient time-based planning.
- Category Experimentation: Experiment with organizing daily boxes into different categories like Work/Home/Misc, Meetings/To-Dos/Self-Care, or Urgent/Less Urgent/Nice to Have.
- Multifunctional Tracking: Tailor the Vertical LifePlanner™ for tracking projects, goals, and habits by assigning boxes to different aspects of life.
- Memory Keeping: Record plans, trips, occasions, and memories using monthly and weekly spreads, embellishing with stickers for a keepsake book.
- Health and Wellness Tracking: Utilize the planner for health planning, tracking treatments, nutrition, workouts, and progress towards wellness goals.
- Quote Inspiration: Find a motivational quote and write it across the top of your weekly spread to keep you inspired.
- Mindfulness Planning: Set daily intentions, log gratitude, and journal for mental health to transform your planner into a mindfulness tool.
Customize your new LifePlanner™ by choosing your cover design, then interior design, select your layout preference, your calendar dates, and even personalize it if you like!
Explore More LifePlanner™ Layouts.
In the market for multiple planners (for yourself or as gifts), or curious about other planner types and how to organize your planner? You’ll love these popular planning guides:
- How to Plan in a Dashboard LifePlanner™ + 10 Creative Planner Prompts
- How to Plan in a Horizontal Weekly LifePlanner™ + 10 Creative Planner Prompts
- How to Plan in an Hourly LifePlanner™ + 10 Creative Planner Prompts
- Daily LifePlanner™ vs. Weekly LifePlanner™: Which One Is Better for You?
- LifePlanner™ Hacks and Planning Tips
- How to Start Planning